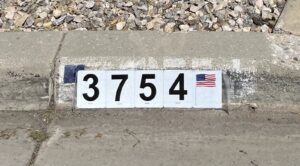
How To Install Your Reflective Curb Address
"Door dash always delivered my order to the wrong house. It was the most frustrating thing in the world. I don't have that problem anymore thanks to Address Only!" Kim C.
"Every time I come home I can see my curb address shining bright. Love the way they look!" -Tim L.
How To Install Your Reflective Curb Address Kit
Prepare the Surface
Before you begin, make sure your curb is clean and free from debris. A clean surface will help create a strong bond for your new address tiles.
Unbox the Kit
Inside the kit, you'll find everything you need for installation. Take out the pre-assembled number tiles. Note: Don't remove the transfer tape on the front until all steps are completed.
Apply Adhesive
Open the adhesive and generously apply it to the back of each tile. Ensure that every edge and the center are coated evenly with adhesive.
Place and Press
Place the tiles against the desired area of the curb and press down firmly. Use a roller to press from top to bottom and left to right. This eliminates air bubbles and ensures even adhesive spreading.
Let it Dry
Allow the address tiles to dry for 48 hours. During this time, avoid contact with car tires or other objects to ensure proper adhesion.
Remove Transfer Tape
After 72 hours, gently peel off the transfer tape while following with the roller. The tape removal will reveal your beautifully reflective address.
Setting Up Your Yard Sign:
Unbox your Yard Sign and Spider Yard Stake.
Align the stake with the designated slot on the yard sign and slide into place.
Step on the foothold on the stake until it's securely in placed in the ground.
With just a few effortless steps, your Yard Sign is ready to help your address stand out and be easily located!

